In the simplest terms, a database is a collection of data. An effective database allows you to enter, store, organize, and retrieve large amounts of related data. Access is different from other Microsoft Office applications you may have used. Although you create and work with a single Access database file, inside the file, there are multiple objects. Within each Access database, you create, edit, and save (and delete) objects. The types of objects in an Access database are:
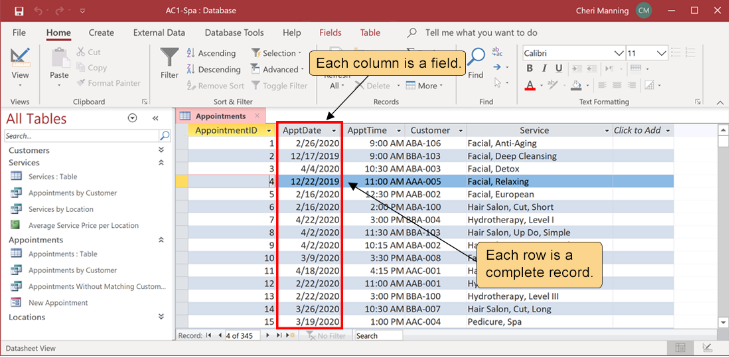
Tables—Store all the database data. They are the essential building blocks of the database. A table looks similar to a spreadsheet. Each row in the table contains all the data for a single record. Each column in the table represents a specific data value called a field. All records in a table have the same fields.
Figure AC 1.1 shows the Appointments table, which stores the data for each customer appointment.

Because Access allows you to relate tables to one another, it is often referred to as a relational database. A relational database is a group of tables related to one another by common fields.
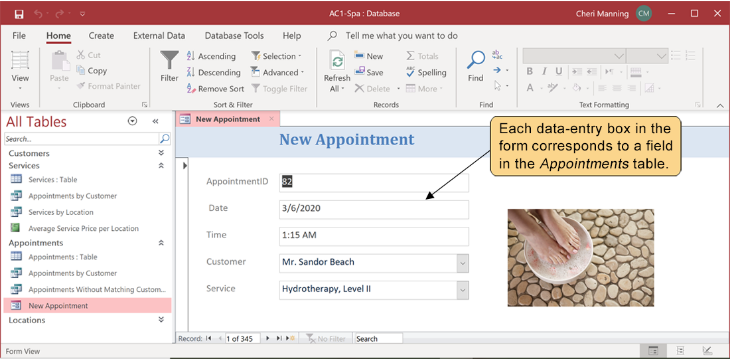
Forms—Allow users to input data through a friendly interface. Entering data through a form is easier than entering it directly into a table. All the data entered into a form are stored in the underlying database table(s).
Figure AC 1.2 shows the New Appointment form, which allows a data-entry operator to enter new appointments. When a new appointment is created using this form, a new record is added to the Appointments table.
Queries—Extract data from a table or related tables. Queries can also perform actions on tables such as updating data values or deleting data. Query results may look like a table, but they do not store data permanently. The query results are updated dynamically each time the query is run—retrieving data fresh from the table(s) upon which the query is based.
The query in Figure AC 1.3 returns a list of all the appointments for each customer. The query combines data from three tables: Appointments, Customers, and Services.

Reports—Display database information for printing or viewing on-screen. Reports do not allow data entry; they are read-only.
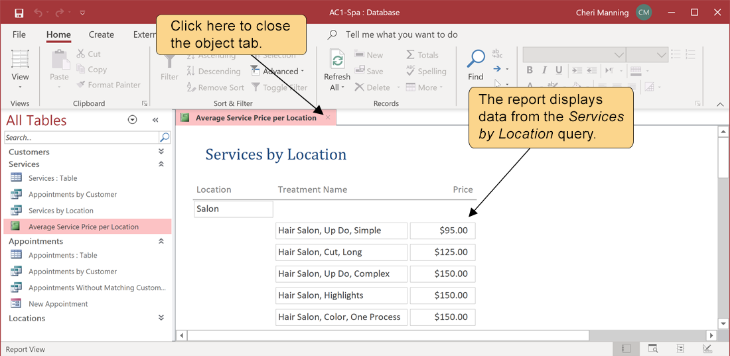
The report in Figure AC 1.4, Average Service Price per Location, displays a printable list of services available for each location. This report displays the results of the Services by Location query in a format suitable for printing.
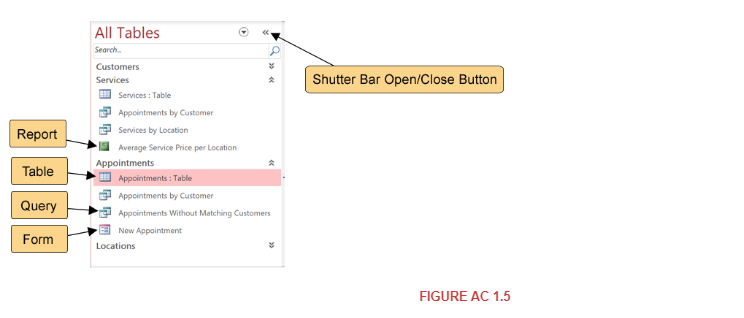
All the database objects are organized in the Navigation Pane, which is docked at the left side of the screen. Each database object in the Navigation Pane has a name and an icon representing the type of object.
The Navigation Pane is usually expanded when you open an Access database. If you need more room to work, you can collapse the Navigation Pane by clicking the Shutter Bar Open/Close button. To expand the Navigation Pane again, click the Shutter Bar Open/Close button.
To open a database object, double-click the object name in the Navigation Pane. The object will appear as a new tab within the Access work area unless it is specifically designed to open in a window format. You can have multiple database objects open at the same time. To navigate from one object to another, click the object tab.
To close an object, click the X at the right side of the object tab. Be careful not to click the X in the upper right corner of the database window—that will close the database!
A fourth type of database object called a macro is a collection of programming code usually used within forms and reports to create buttons and other user interface elements. You will not work with macros until you are a more experienced Access user.
You can also close an open database object by right-clicking the object tab and selecting Close.
Open the student data file AC1-Spa and try this skill on your own: